This guide covers everything about managing rows, columns, and headers in ReoGrid — from basic insert/delete operations to header customization, styling, visibility control, and events.
Row and Column Count
Get or Set Count
Use properties or methods to get or set the number of rows and columns:
var sheet = grid.CurrentWorksheet;

// Get current counts
int rowCount = sheet.RowCount;    // or sheet.Rows
int colCount = sheet.ColumnCount; // or sheet.Columns

// Set counts
sheet.RowCount = 500;
sheet.ColumnCount = 50;

// Or use methods
sheet.SetRows(500);
sheet.SetCols(50);

// Resize both at once
sheet.Resize(500, 50);
Predefined Values
| Initial | Minimum | Maximum | Data Type | |
|---|---|---|---|---|
| Number of Rows | 200 | 1 | 1,048,576 | Paging-indexed two-dimensional array |
| Number of Columns | 100 | 1 | 32,768 | Paging-indexed two-dimensional array |
| Row Height (pixels) | 20 | 0 | 65,535 | ushort |
| Column Width (pixels) | 70 | 0 | 65,535 | ushort |
You can also change the default initialization size:
// Set default sizes before creating worksheets
Worksheet.InitializationRows = 500;
Worksheet.InitializationColumns = 200;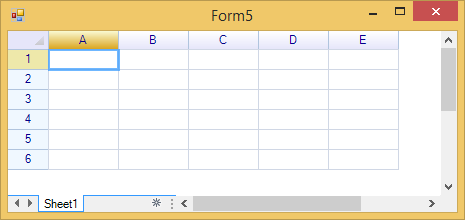
Append / Insert / Delete
Append Rows and Columns
Append rows or columns at the end of the grid:
sheet.AppendRows(10);    // Append 10 rows at the bottom
sheet.AppendColumns(5);  // Append 5 columns at the right
Insert Rows and Columns
Insert rows or columns before a specified position:
// Insert 3 rows before row index 5
sheet.InsertRows(5, 3);

// Insert 2 columns before column index 2
sheet.InsertColumns(2, 2);
Delete Rows and Columns
Delete rows or columns starting from a specified position:
// Delete 3 rows starting from row index 5
sheet.DeleteRows(5, 3);

// Delete 2 columns starting from column index 2
sheet.DeleteColumns(2, 2);
Note: In all methods above, the first parameter is the zero-based index and the second parameter is the count. At least one row and one column must always remain.
Using Actions (Undo/Redo Support)
All row/column operations can be performed through actions, which support undo, redo, and repeat:
// Insert rows/columns with undo support
sheet.DoAction(new InsertRowsAction(5, 3));
sheet.DoAction(new InsertColumnsAction(2, 2));

// Delete rows/columns with undo support
sheet.DoAction(new RemoveRowsAction(5, 3));
sheet.DoAction(new RemoveColumnsAction(2, 2));
Row Height and Column Width
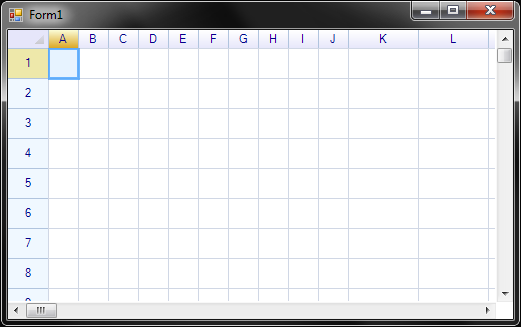
Set Height and Width
Set height or width for a range of rows or columns:
// Set height for rows 0–9 to 30 pixels
sheet.SetRowsHeight(0, 10, 30);

// Set width for columns 0–4 to 120 pixels
sheet.SetColumnsWidth(0, 5, 120);

// Set all rows to the same height
sheet.SetRowsHeight(0, sheet.RowCount, 25);

// Set all columns to the same width
sheet.SetColumnsWidth(0, sheet.ColumnCount, 100);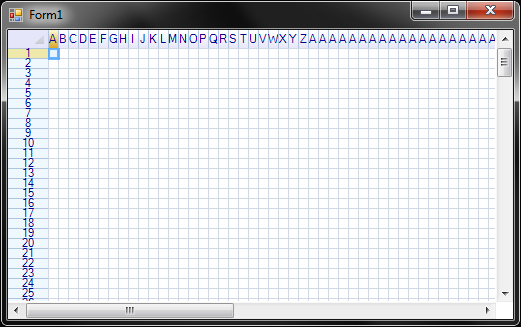
Using a Custom Height/Width Function
You can use a function to set different heights/widths for each row or column:
// Set varying heights: row 0 = 20px, row 1 = 25px, row 2 = 30px, ...
sheet.SetRowsHeight(0, 10, row => 20 + row * 5);

// Set varying widths
sheet.SetColumnsWidth(0, 5, col => 80 + col * 20);
Using Actions (Undo/Redo Support)
sheet.DoAction(new SetRowsHeightAction(0, 10, 30));
sheet.DoAction(new SetColumnsWidthAction(0, 5, 120));
Note: The
SetRowsHeightActionandSetColumnsWidthActionconstructors take the starting index, the count, and the new size in pixels. These actions integrate with ReoGrid’s undo/redo framework.
Get Height and Width via Header Instance
// Get height of a specific row
int height = sheet.RowHeaders[2].Height;

// Get width of a specific column
int width = sheet.ColumnHeaders[3].Width;

// Get position information
int top = sheet.RowHeaders[2].Top;
int bottom = sheet.RowHeaders[2].Bottom;
int left = sheet.ColumnHeaders[3].Left;
int right = sheet.ColumnHeaders[3].Right;
Set Height and Width via Header Instance
sheet.RowHeaders[3].Height = 40;
sheet.ColumnHeaders[2].Width = 150;
Note: Performance note: When changing the height or width of multiple rows or columns, use the worksheet methods (
SetRowsHeight,SetColumnsWidth) rather than setting individual header properties. The worksheet methods batch the operation and provide significantly better performance.Prefer this:
sheet.SetRowsHeight(2, 3, 30); // from index 2, 3 rows, height 30Over this:
sheet.RowHeaders[2].Height = 30;
sheet.RowHeaders[3].Height = 30;
sheet.RowHeaders[4].Height = 30;
Auto Row Height
ReoGrid automatically adjusts the row height when a cell value changes through editing:
Disable Auto Row Height
Disable automatic height adjustment for individual rows:
sheet.RowHeaders[2].IsAutoHeight = false;Auto-Fit Row Height and Column Width
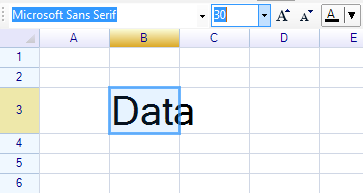
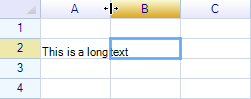
When you double-click on the separator between headers, ReoGrid adjusts the row height or column width to fit the largest cell content.
Before:
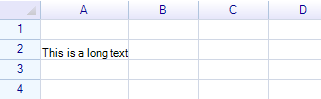
After:
Programmatic Auto-Fit
// Auto-fit column width for column 0 (A)
sheet["A2"] = "This is a long text";
sheet.AutoFitColumnWidth(0, false);

// Auto-fit row heights for rows 0–9
sheet.AutoFitRowsHeight(0, 10, false);
The second argument specifies whether to use an action (enabling undo via Undo() or Ctrl+Z).
Auto Column Width
Enable auto-width for individual columns:
sheet.ColumnHeaders[0].IsAutoWidth = true;Hide and Show Rows / Columns
Hide and Show
// Hide rows
sheet.HideRows(3, 2); // Hide 2 rows starting from row 3
// Show (unhide) rows
sheet.ShowRows(3, 2);
// Hide columns
sheet.HideColumns(1, 3); // Hide 3 columns starting from column 1
// Show (unhide) columns
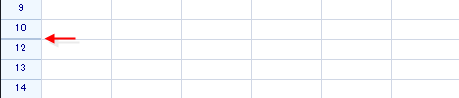
sheet.ShowColumns(1, 3);A hidden row or column is displayed as a single line:
Note: -
HideRowsandHideColumnsautomatically collapse any outlines whose rows or columns are being hidden.
ShowRowsandShowColumnsautomatically expand any outlines whose rows or columns are being shown. Example:Hide rows grouped by an outline:
The outline collapses automatically:

For more details, see Group & Outline.
Hide via Header Instance
// Hide a row
sheet.RowHeaders[3].IsVisible = false;

// Hide a column
sheet.ColumnHeaders[2].IsVisible = false;
Check Visibility
// Check row/column visibility
bool rowVisible = sheet.IsRowVisible(3);
bool colVisible = sheet.IsColumnVisible(2);

// Check visibility to user (considers filtering as well)
bool rowVisibleToUser = sheet.IsRowVisibleToUser(3);
bool colVisibleToUser = sheet.IsColumnVisibleToUser(2);

// Via header instances
bool visible = sheet.RowHeaders[3].IsVisible;
bool visibleToUser = sheet.RowHeaders[3].IsVisibleToUser;
Check Cell Visibility
bool hidden = sheet.IsCellVisible(3, 2);

// Via cell instance
var cell = sheet.Cells["H8"];
bool cellVisible = cell.IsVisible;
Header Instances
Access individual header objects from the worksheet:
var sheet = grid.CurrentWorksheet;

// Get header instances by index
var rowHeader = sheet.RowHeaders[3];
var colHeader = sheet.ColumnHeaders[2];

// Get column header by address
var colHeaderA = sheet.ColumnHeaders["A"];
var colHeaderZ = sheet.ColumnHeaders["Z"];

// Worksheet methods
var rowHeader2 = sheet.GetRowHeader(3);    // returns null if out of range
var colHeader2 = sheet.GetColumnHeader(2); // returns null if out of range
Common Header Properties
All headers (both row and column) share these base properties:
| Property | Type | Description |
|---|---|---|
Index | int | Zero-based index of the header (read-only) |
IsVisible | bool | Whether the row/column is visible |
IsVisibleToUser | bool | Visibility considering both IsVisible and size > 0 (read-only) |
Tag | object | User-defined data storage |
Body | IHeaderBody | Custom header body for custom rendering |
DefaultCellBody | Type | Default cell body type for all cells in this row/column |
Row Header Properties
| Property | Type | Description |
|---|---|---|
Text | string | Display text for the row header |
TextColor | SolidColor? | Color for the header text |
Height | ushort | Height of the row in pixels |
Top | int | Top position in pixels (read-only) |
Bottom | int | Bottom position in pixels (read-only) |
IsAutoHeight | bool | Allow automatic height adjustment to fit the largest cell |
IsSelected | bool | Whether the row is selected (read-only) |
Column Header Properties
| Property | Type | Description |
|---|---|---|
Text | string | Display text for the column header |
TextColor | SolidColor? | Color for the header text |
AddressText | string | Column address (e.g., “A”, “B”, “Z”) (read-only) |
Width | ushort | Width of the column in pixels |
Left | int | Left position in pixels (read-only) |
Right | int | Right position in pixels (read-only) |
IsAutoWidth | bool | Allow automatic width adjustment |
HeaderCell | HeaderCell | The HeaderCell instance of this column header (read-only) |
Header Text Customization
Change Column Header Text
sheet.ColumnHeaders[0].Text = "Product";
sheet.ColumnHeaders[1].Text = "Price";
sheet.ColumnHeaders[2].Text = "Quantity";
Change Row Header Text
sheet.RowHeaders[0].Text = "Item 1";
sheet.RowHeaders[1].Text = "Item 2";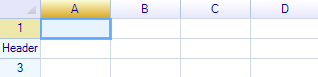
Change Row Header Width
The row header area width can be changed to display more text:
sheet.RowHeaderWidth = 100;
sheet.RowHeaders[1].Text = "Row Header";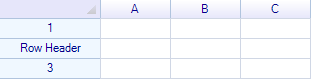
Set to special values:
0— Hide the row header area-1— Restore to the system default width
Change Header Text Color
// Set text color for a specific column header
sheet.ColumnHeaders[0].TextColor = new SolidColor(Color.Red);

// Set text color for a specific row header
sheet.RowHeaders[0].TextColor = new SolidColor(Color.Blue);

// Remove custom text color (revert to default)
sheet.ColumnHeaders[0].TextColor = null;
Row Header Style
ReoGrid provides a RowHeaderStyle object for globally styling all row headers on a worksheet. Access it via the RowHeaderStyle property:
var style = sheet.RowHeaderStyle;RowHeaderStyle Properties
| Property | Type | Default | Description |
|---|---|---|---|
TextColor | SolidColor? | null (system default) | Color for header text. Set to null to remove. |
BackColor | SolidColor? | null (system default) | Background color. Set to null to remove. |
FontSize | float | 12f (WinForms) | Font size |
Font | string / FontFamily | ”Arial” (WinForms) | Font name (WinForms) or FontFamily (WPF) |
FontStyle | FontStyles / FontStyle | Regular | Font style (bold, italic, etc.) |
HorizontalAlignment | ReoGridHorAlign | Center | Text horizontal alignment |
VerticalAlignment | ReoGridVerAlign | Middle | Text vertical alignment |
Padding | PaddingValue | (empty) | Cell padding |
Example: Customize Row Header Appearance
var style = sheet.RowHeaderStyle;

// Change font
style.Font = "Consolas";
style.FontSize = 10;

// Change colors
style.TextColor = new SolidColor(Color.DarkBlue);
style.BackColor = new SolidColor(Color.LightGray);

// Change alignment
style.HorizontalAlignment = ReoGridHorAlign.Left;
style.Padding = new PaddingValue(4, 0, 4, 0);  // left, top, right, bottom
Reset Row Header Style
sheet.RowHeaderStyle.Reset();Show / Hide Header Areas
Use worksheet settings to control header visibility:
// Hide column headers
sheet.SetSettings(WorksheetSettings.View_ShowColumnHeader, false);

// Hide row headers
sheet.SetSettings(WorksheetSettings.View_ShowRowHeader, false);

// Show them again
sheet.SetSettings(WorksheetSettings.View_ShowColumnHeader, true);
sheet.SetSettings(WorksheetSettings.View_ShowRowHeader, true);

// Check current setting
bool showColHeader = sheet.HasSettings(WorksheetSettings.View_ShowColumnHeader);
Column Default Cell Type
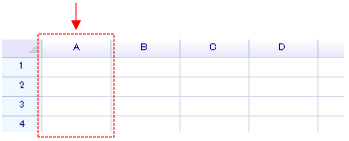
You can specify a default cell type for an entire column. When cells are created in that column, they automatically use the specified cell body:
// Set column A to use CheckBoxCell
sheet.ColumnHeaders["A"].DefaultCellBody = typeof(unvell.ReoGrid.CellTypes.CheckBoxCell);

// Set horizontal alignment for the column
sheet.ColumnHeaders["A"].Style.HorizontalAlign = ReoGridHorAlign.Center;

// Give the checkbox a small padding
sheet.ColumnHeaders["A"].Style.Padding = new System.Windows.Forms.Padding(2);
Setting the cell type alone does not display anything — the cell body is displayed only when cell data is set:
sheet["A1:A5"] = new object[] { false, true, false, false, true };The checkbox cell accepts a bool value as data:
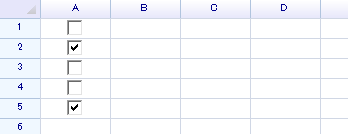
Custom Header Body
You can create custom header rendering by implementing the IHeaderBody interface and assigning it to a header’s Body property:
// Assign a custom header body to a column header
sheet.ColumnHeaders[0].Body = new MyCustomHeaderBody();
The IHeaderBody interface allows you to define custom painting, mouse interaction, and sizing logic for individual headers.
User Data (Tag)
Attach arbitrary user data to any header:
// Store custom data
sheet.RowHeaders[0].Tag = new { Category = "Sales", Priority = 1 };
sheet.ColumnHeaders[0].Tag = "PrimaryKey";

// Retrieve it later
var tag = sheet.ColumnHeaders[0].Tag;
Events
Row and Column Structure Events
| Event | Event Args | Description |
|---|---|---|
RowsInserted | RowsInsertedEventArgs | Raised when rows are inserted |
RowsDeleted | RowsDeletedEventArgs | Raised when rows are deleted |
ColumnsInserted | ColumnsInsertedEventArgs | Raised when columns are inserted |
ColumnsDeleted | ColumnsDeletedEventArgs | Raised when columns are deleted |
RowsHeightChanged | RowsHeightChangedEventArgs | Raised when row height changes |
ColumnsWidthChanged | ColumnsWidthChangedEventArgs | Raised when column width changes |
Event Args Properties
RowsInsertedEventArgs / RowsDeletedEventArgs:
Row(int) — Starting row indexCount(int) — Number of rows affected
ColumnsInsertedEventArgs / ColumnsDeletedEventArgs:
Index(int) — Starting column indexCount(int) — Number of columns affected
RowsHeightChangedEventArgs:
Row(int) — Starting row indexCount(int) — Number of rows affectedHeight(int) — New height value
ColumnsWidthChangedEventArgs:
Index(int) — Starting column indexCount(int) — Number of columns affectedWidth(int) — New width value
Example: Listen to Row/Column Events
sheet.RowsInserted += (s, e) =>
{
    Console.WriteLine($"Inserted {e.Count} rows at row {e.Row}");
};

sheet.ColumnsWidthChanged += (s, e) =>
{
    Console.WriteLine($"Width changed for {e.Count} columns starting at {e.Index}, new width: {e.Width}");
};
Individual Header Events
Row headers and column headers fire events on their own instances:
// Listen to height changes on a specific row
sheet.RowHeaders[3].HeightChanged += (s, e) =>
{
    Console.WriteLine($"Row 3 height changed to {e.Height}");
};

// Listen to width changes on a specific column
sheet.ColumnHeaders[2].WidthChanged += (s, e) =>
{
    Console.WriteLine($"Column 2 width changed to {e.Width}");
};
Related Topics
- Multiple Row Header — Create multi-row column headers
- Group & Outline — Group rows/columns with expand/collapse
- Freeze Panes — Freeze rows and columns
- Data Filtering — Filter rows by data
- Worksheet Settings — All worksheet settings including header visibility
- Cell Types — Setting default cell types per column