The cell is the fundamental unit within a worksheet. Each cell can hold data, formulas, styles, custom rendering bodies, and data validation rules.
Key Features
- Data Storage — Hold text, numbers, dates, booleans, custom objects, and more
- Styling — Apply fonts, colors, borders, alignment, padding, and rotation
- Data Formatting — Display content as currency, date, percentage, etc.
- Formulas — Calculate values using Excel-compatible formulas
- Customization — Host custom cell bodies (dropdowns, buttons, checkboxes)
- Data Validation — Validate user input
- Merging — Combine cells into larger cells
- Protection — Lock cells to prevent editing
Locating a Cell
Cells can be referenced in three ways:
// By address string
sheet["D5"] = "hello";

// By row and column index (zero-based)
sheet[4, 3] = "hello";

// By CellPosition structure
var pos = new CellPosition("D5");  // or new CellPosition(4, 3)
sheet[pos] = "hello";
CellPosition Structure
// Create from address
var pos = new CellPosition("D5");

// Create from indices
var pos = new CellPosition(4, 3);  // row: 4, col: 3

// Convert to address string
string address = pos.ToAddress();  // "D5"

// Validate an address
CellPosition.IsValidAddress("D5");       // true
CellPosition.IsValidAddress("A1:D5");    // false (this is a range)
CellPosition.IsValidAddress("myrange");  // false (but sheet["myrange"] works for named ranges)
Cell Instances
ReoGrid creates cell instances on demand — only when data, styles, or other properties are set. This conserves memory for large worksheets.
Get a Cell Instance
// Always creates an instance if it doesn't exist
var cell = sheet.Cells["A1"];
var cell = sheet.Cells[1, 2];
var cell = sheet.Cells[new CellPosition("C2")];
var cell = sheet.Cells["myNamedRange"];  // First cell in named range
Note: Accessing
Cells[...]creates a new cell instance if one doesn’t exist. Avoid iterating all cells using this collection — it creates many empty instances and consumes memory.
Get Without Creating
// Returns null if the cell doesn't exist
var cell = sheet.GetCell("A1");
var cell = sheet.GetCell(0, 0);
var cell = sheet.GetCell(new CellPosition("A1"));

if (cell != null)
{
    // Process existing cell
}
Create and Get
// Creates if needed (same behavior as Cells[...])
var cell = sheet.CreateAndGetCell("A1");
var cell = sheet.CreateAndGetCell(0, 0);
var cell = sheet.CreateAndGetCell(new CellPosition("A1"));
Get Merged Cell
When a cell is part of a merged range, get the top-left cell of the merge:
var mergedCell = sheet.GetMergedCellOfRange("B3");
var mergedCell = sheet.GetMergedCellOfRange(new CellPosition(2, 1));
var mergedCell = sheet.GetMergedCellOfRange(2, 1);
var mergedCell = sheet.GetMergedCellOfRange(cell);
Cell Properties
Core Properties
| Property | Type | Description |
|---|---|---|
Data | object | The cell value (text, number, date, custom object) |
Formula | string | Formula expression (e.g., "=A1+B1") |
HasFormula | bool | Whether the cell has a formula (read-only) |
FormulaStatus | FormulaStatus | Status of formula evaluation (read-only) |
DisplayText | string | The rendered text displayed in the cell (read-only) |
Style | ReferenceCellStyle | Style object for setting appearance |
CalcedStyle | WorksheetRangeStyle | The fully resolved computed style (read-only) |
Body | ICellBody | Custom cell body (button, checkbox, etc.) |
Position Properties
| Property | Type | Description |
|---|---|---|
Row | int | Zero-based row index (read-only) |
Column | int | Zero-based column index (read-only) |
Position | CellPosition | Cell position as a struct (read-only) |
Address | string | Cell address string like “A1” (read-only) |
PositionAsRange | RangePosition | Cell position as a 1x1 range (read-only) |
RangePosition | RangePosition | Range including merged area if applicable (read-only) |
Worksheet | Worksheet | Parent worksheet (read-only) |
Merge Properties
| Property | Type | Description |
|---|---|---|
IsMergedCell | bool | Whether this cell is the start of a merged range |
IsValidCell | bool | Whether the cell is valid (not consumed by a merge) |
InsideMergedRange | bool | Whether the cell is within a merged range |
GetRowspan() | short | Number of rows this cell spans |
GetColspan() | short | Number of columns this cell spans |
Data Format Properties
| Property | Type | Description |
|---|---|---|
DataFormat | CellDataFormatFlag | Data format type (Number, Currency, Date, etc.) |
DataFormatArgs | object | Format-specific arguments |
CustomDataFormatter | IDataFormatter | Custom data formatter implementation |
Protection Properties
| Property | Type | Description |
|---|---|---|
IsLocked | CellLock | Lock state: Locked, Unlocked, or Inherit |
IsReadOnly | bool | Whether the cell is read-only |
IsVisible | bool | Whether the cell is visible (not on a hidden row/column) |
Other Properties
| Property | Type | Description |
|---|---|---|
Tag | object | User-defined data storage |
DataInputUnit | int | Data input unit identifier |
Validator | IValidator | Data validation rule |
HighlightColor | SolidColor? | Highlight color for the cell |
Border | CellBorderProperty | Border properties (read-only) |
ConditionalStyles | List<WorksheetRangeStyle> | Applied conditional styles (read-only) |
Cell Methods
| Method | Return | Description |
|---|---|---|
GetData<T>() | T | Get cell data cast to type T |
SetDataFormat(format, args) | void | Set data format and arguments |
BindStyle(style) | void | Bind a style object to the cell |
StartEdit() | void | Enter edit mode on this cell |
EndEdit(data) | void | End edit mode, optionally setting data |
ExpandRowHeight() | void | Expand row height to fit this cell’s content |
ExpandColumnWidth() | void | Expand column width to fit this cell’s content |
Clone() | Cell | Create a copy of this cell |
GetBounds() | Rectangle | Get the bounds rectangle of this cell |
Cell Data
Set Single Cell Data
// By address
sheet["A1"] = 10;

// By index
sheet[0, 0] = 10;            // number
sheet[0, 1] = "text";        // string
sheet[0, 2] = DateTime.Now;  // datetime
sheet[0, 3] = true;          // boolean

// By CellPosition
sheet[new CellPosition("A1")] = 10;

// By named range
sheet.DefineNamedRange("mycell", new RangePosition("A1"));
sheet["mycell"] = 10.12345d;

// By method call
sheet.SetCellData(5, 2, "hello world");

// Custom data type
public class MyData {
    public override string ToString() { return "custom display"; }
}
sheet["D1"] = new MyData();
Set Range Data
// Horizontal fill within range
sheet["A1:C1"] = new object[] { "A", "B", "C" };

// Vertical fill
sheet["A1:A3"] = new object[] { 10, 11, 12 };

// Two-dimensional array
sheet[1, 1] = new object[,] { { "a", "b", "c" }, { 1, 2, 3 } };

// Using method
sheet.SetRangeData(new RangePosition(1, 1, 3, 3),
    new object[,] { { "a", "b", "c" }, { 1, 2, 3 }, { 4, 5, 6 } });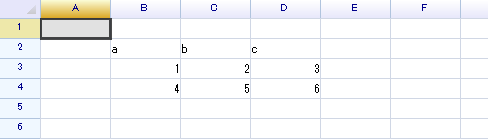
Get Cell Data
// Get raw data (object)
object value = sheet["A1"];

// Get typed data from a cell instance
int intValue = sheet.Cells["A1"].GetData<int>();
string textValue = sheet.Cells["A1"].GetData<string>();
Set Data with Undo Support
sheet.DoAction(new SetCellDataAction("B5", "hello world"));

// Undo
grid.Undo();

// Redo
grid.Redo();
Auto Data Format
ReoGrid automatically detects data types on input and applies appropriate formatting (number alignment, date formats, etc.).
Disable Auto Format
sheet.SetSettings(WorksheetSettings.Edit_AutoFormatCell, false);Auto Data Type Conversion
When string data is entered into a number-formatted cell, it’s automatically converted:
sheet[3, 1] = "10"; // Converted to numeric 10To preserve the original string type, set the cell format to Text:
sheet.SetRangeDataFormat(3, 2, 1, 1, CellDataFormatFlag.Text, null);
sheet[3, 2] = "10";  // Preserved as string "10"
See Data Format for details.
Cell Validity and Visibility
// Check if a position is valid
bool valid = sheet.IsValidCell("A1");
bool valid = sheet.IsValidCell(0, 0);

// Check if a cell is a merged cell
bool merged = sheet.IsMergedCell("B3");
bool merged = sheet.IsMergedCell(new RangePosition(1, 1, 2, 2));

// Check if a cell is visible
bool visible = sheet.IsCellVisible(3, 2);
bool visibleToUser = sheet.IsCellVisibleToUser(3, 2);

// Via cell instance
var cell = sheet.Cells["A1"];
bool isVisible = cell.IsVisible;
Used Range and Content Bounds
// Get the range that contains data
RangePosition usedRange = sheet.UsedRange;

// Get maximum row/column with content
int maxRow = sheet.MaxContentRow;
int maxCol = sheet.MaxContentCol;
Text Overflow
By default, cell text can overflow into adjacent empty cells:
// Disable text overflow
sheet.DisableSettings(WorksheetSettings.View_AllowCellTextOverflow);

// Re-enable
sheet.EnableSettings(WorksheetSettings.View_AllowCellTextOverflow);
Related Topics
- Cell Editing — Edit behavior and events
- Cell Style — Styling cells
- Border — Cell borders
- Data Format — Number, date, currency formatting
- Cell Types — Custom cell bodies
- Data Validation — Input validation
- Iterate Cells — Iterating over cells
- Rich Format Text — Rich text in cells
- Auto Fill — Auto-fill sequences